유니티에서 엑셀 읽어서 데이터 처리 하는방법 ExcelParser 사용법
제 깃허브에 올린 ExcelParserProject 코드를 통해, 별도로 CSV로 변환하거나 스크립터블 오브젝트로 변환하지 않고도, 엑셀 파일을 직접 읽어 데이터를 활용할 수 있습니다.
이 코드는 ExcelDataReader를 사용하여 엑셀 파일을 읽습니다.
지원하는 엑셀 파일 형식은 *.xls, *.xlsx, *.xlsb", *.csv 입니다
How to Use
1. 엑셀 파일을 지정하는 경우
public ExcelData excelData;

void Start()
{
    string parentFolder = Directory.GetParent(Application.dataPath).FullName;
    string dataSheetfile = Path.Combine(parentFolder, "ExcelData/MonsterData.xlsx");
    ExcelLoader.LoadExcelFile(excelData, dataSheetfile);
}

public class ExcelData
{
    public List<MonsterData> MonsterData;
}

public class MonsterData
{
    public string id;
    public string name;
    public float hp;
    public float attack;
    public int exp;
}
위와 같이 단일 엑셀 파일을 읽어 데이터를 매핑할 수 있습니다.
2. 폴더 내 모든 엑셀 파일을 읽는 경우
public ExcelData excelData;

void Start()
{
    string parentFolder = Directory.GetParent(Application.dataPath).FullName;
    string dataSheetFolder = Path.Combine(parentFolder, "ExcelData");
    ExcelLoader.LoadAllExcelFiles(excelData, dataSheetFolder);
}

public class ExcelData
{
    public List<MonsterData> MonsterData;
}

public class MonsterData
{
    public string id;
    public string name;
    public float hp;
    public float attack;
    public int exp;
}
이렇게 폴더 내의 모든 엑셀 파일을 읽어, 각 시트의 데이터를 해당 변수(예, MonsterData)에 매핑합니다.
폴더 위치
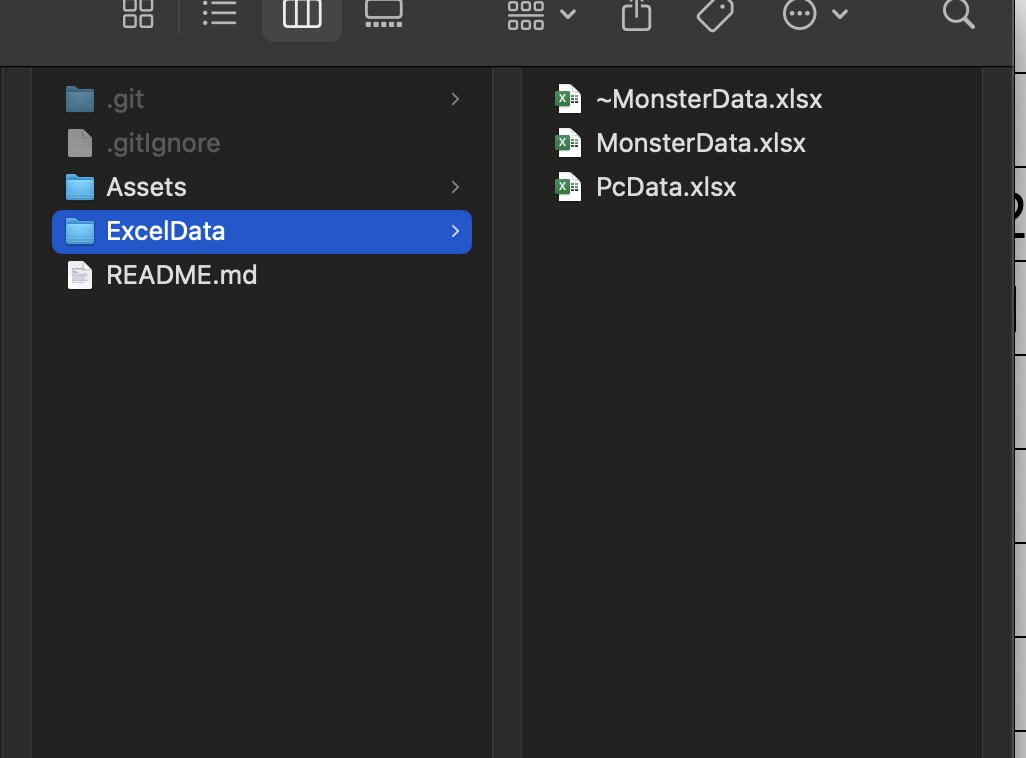
폴더를 통해서 실행할 때는 ~ 또는 # 로 시작하는 엑셀 파일은 무시하도록 했습니다.
엑셀 파일 구성
- 폴더 위치:
엑셀 파일은 지정된 폴더 내에 있어야 하며, 해당 폴더 경로를 코드에서 설정합니다. - 시트 기준 매핑:
각 시트는 해당 변수에 매핑됩니다.
만약 시트 이름 앞에 # 또는 ~가 있으면 해당 시트(또는 컬럼)는 무시됩니다.
시트 이름이 # 이후부터는 무시한다고 생각하면 됩니다
MonsterData = MonsterData # Up
같은 시트 이름은 데이터가 합쳐져서 들어갑니다.
컬럼도 포함. ( 컬럼은 , 가 합쳐져서 들어감 예를들어서 1 와 2 가 있다면 1,2 로 들어갑니다)
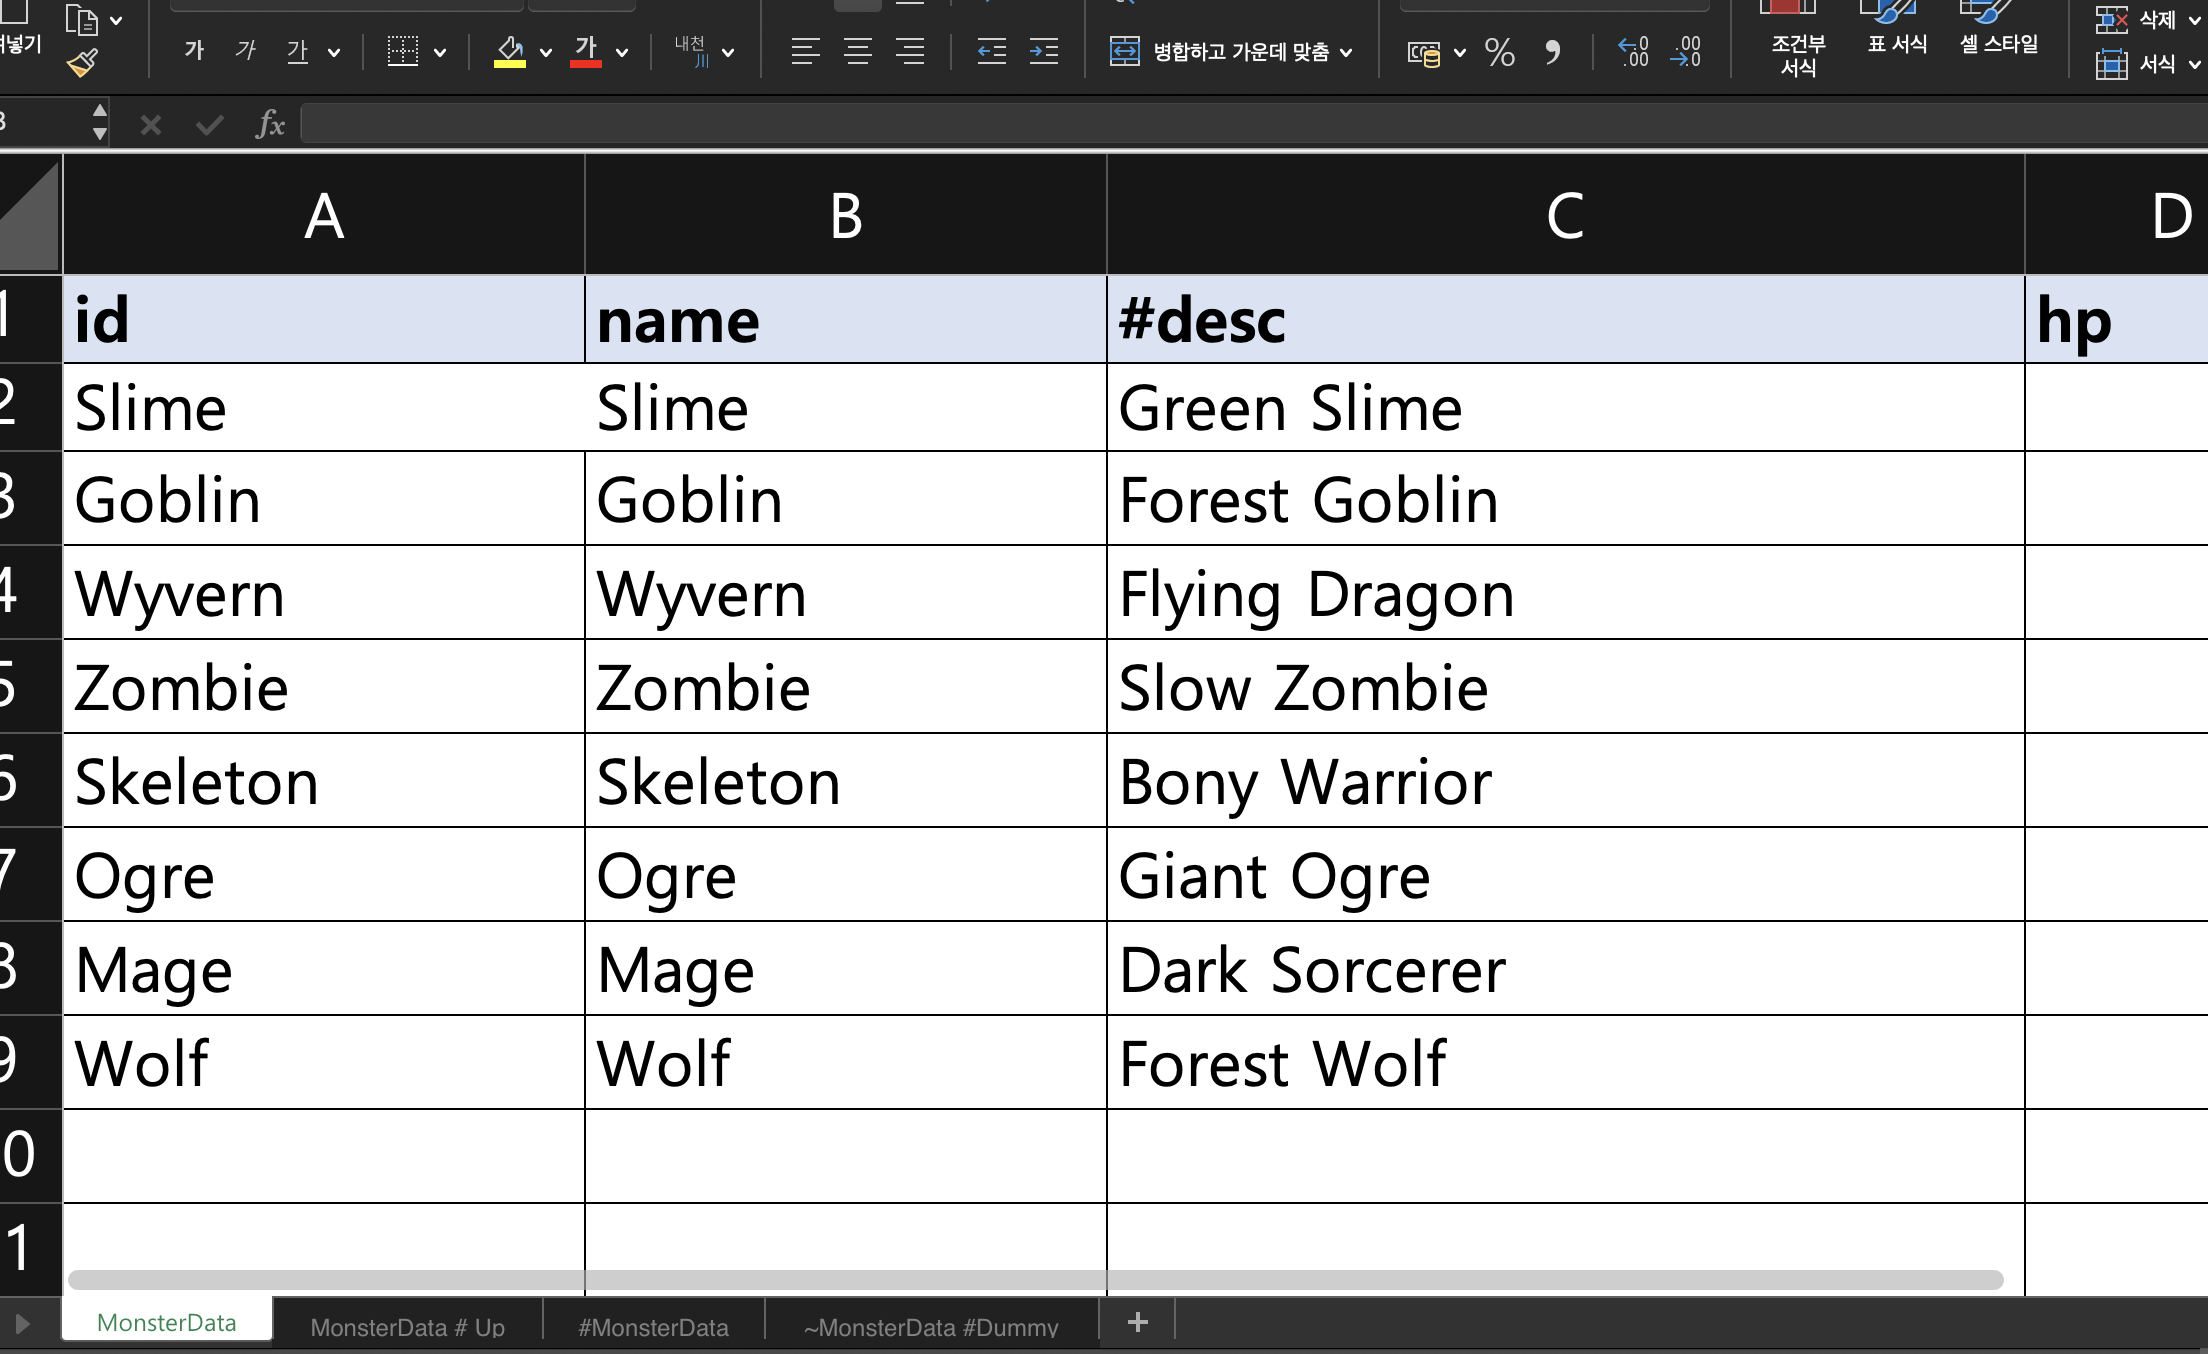
컬럼 앞에 # 나 ~ 가 있으면 해당 컬럼은 무시하고 넘어갑니다.
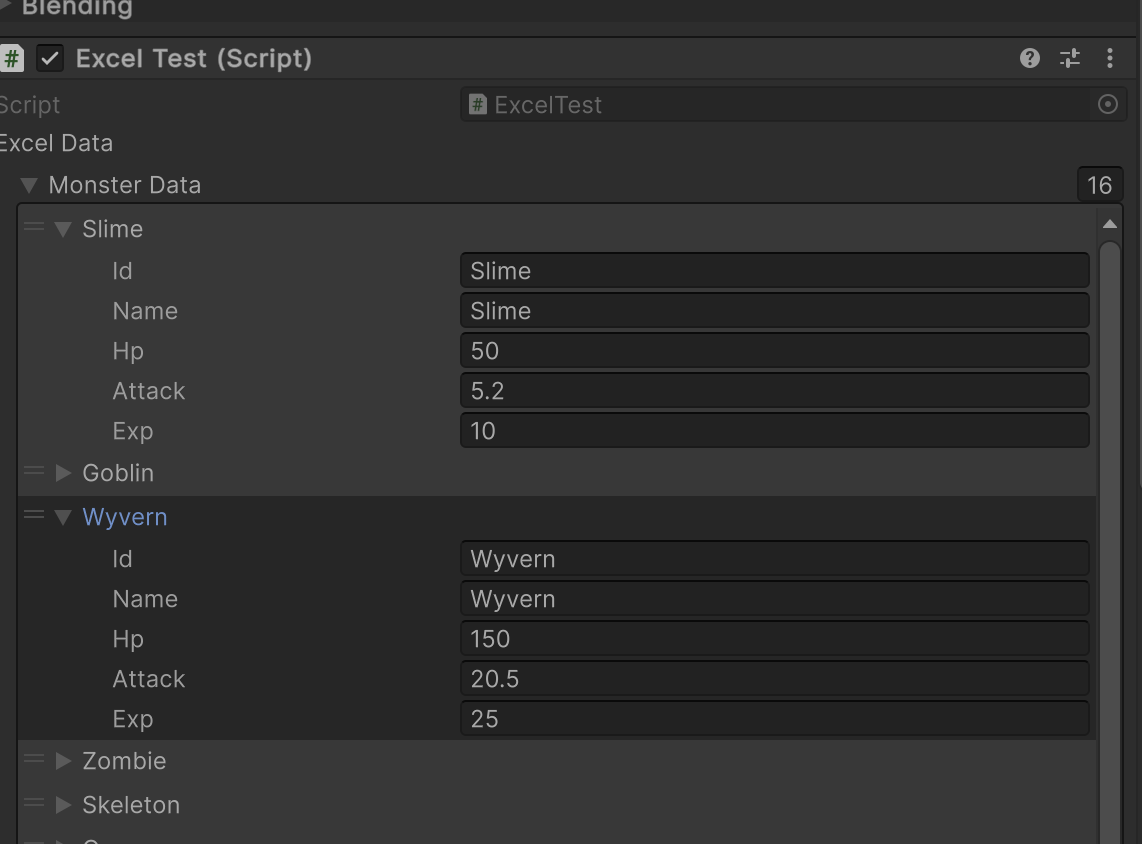
유니티에서 확인하면 잘 들어가있음
첫 번째 행에 변수를 넣기 싫으면
첫 열이 // 또는 ## 로시작하는 문자열로 넣으면 무시합니다
데이터도 마찬가지로 ## 나 // 로 시작하면 해당 데이터를 무시합니다
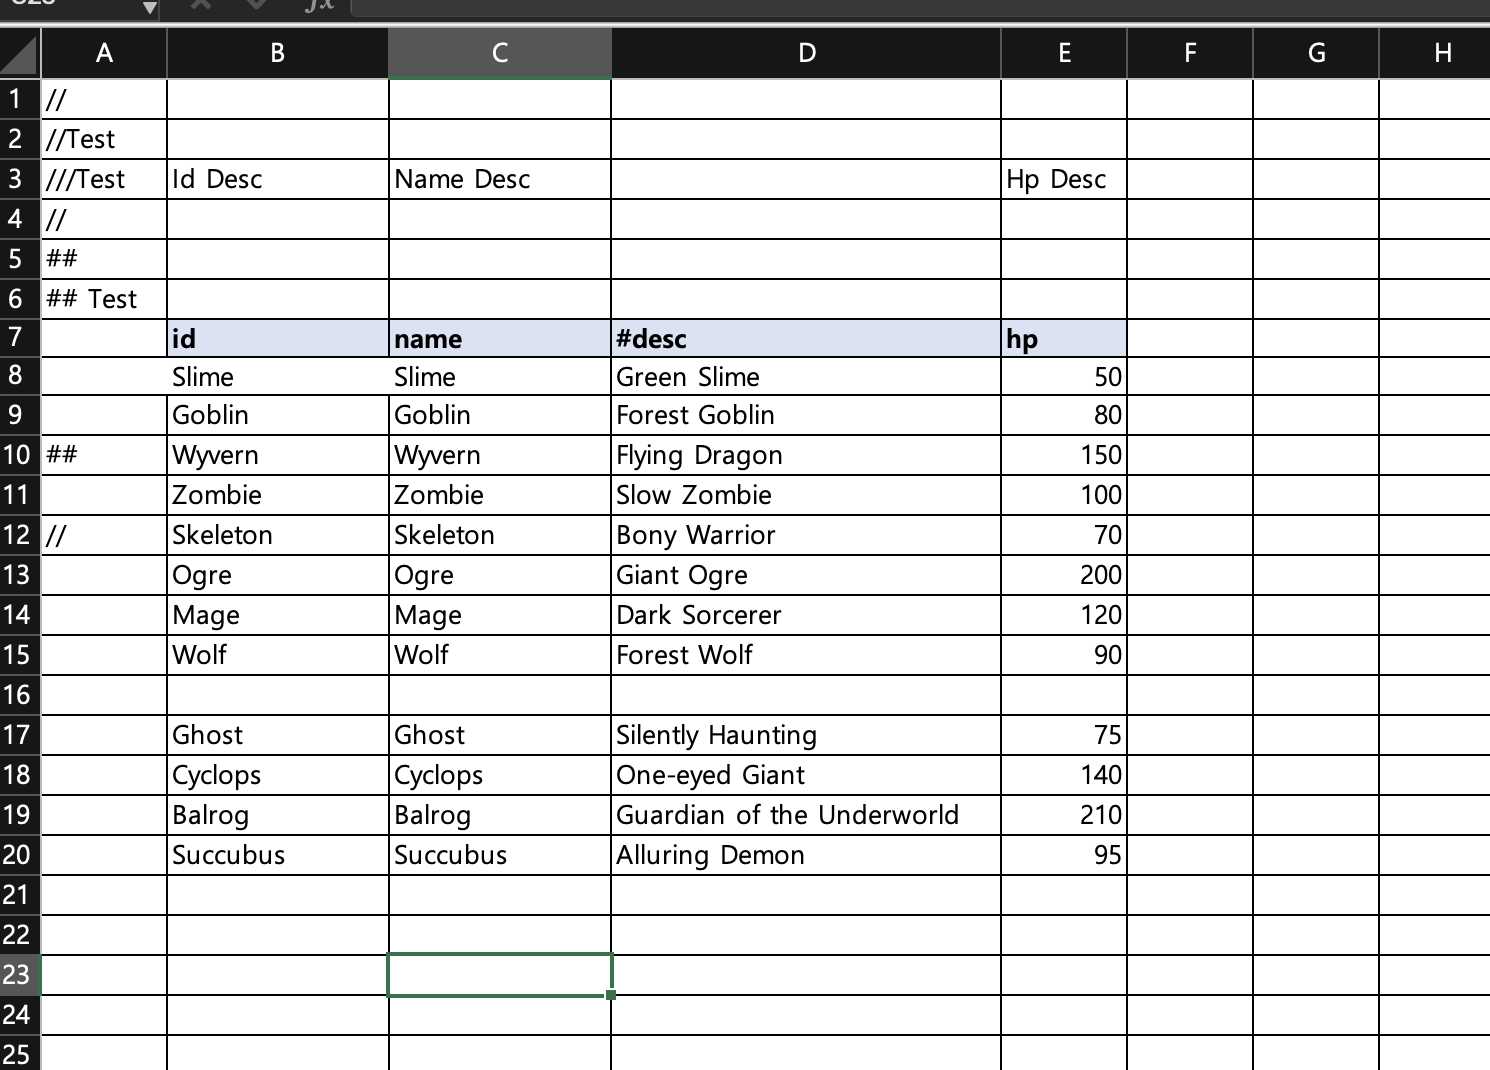
그리고 해당 열의 값이 비어져있다면 거기까지 데이터로 판단하고 그 뒤로 데이터를 수집하지 않습니다
예시로는 Wolf 까지만 들어갑니다.
변수와 시트 이름을 다르게 하고 싶은 경우:
아래처럼 SheetBinding 어트리뷰트를 사용하면,
시트 이름은 "MonsterData"이지만 실제 변수 이름은 TestData로 매핑할 수 있습니다.
public class ExcelData
{
        [SheetBinding(sheetName:"MonsterData")]
        public List<MonsterData> TestData;
}
SheetBinding 어트리뷰트를 확인하시면 됩니다
/// <summary>
/// 필드에 붙여서, "이 필드는 어떤 시트와 매핑되는지"를 지정.
/// 예) [SheetBinding("UnitData", skipIfSheetNotFound=true, optional=true, skipDuplicates=true)]
/// </summary>
[AttributeUsage(AttributeTargets.Field | AttributeTargets.Property)]
public class SheetBindingAttribute : Attribute
{
    /// <summary>연결할 시트(또는 dataType.Name)</summary>
    public string SheetName { get; }

    /// <summary>데이터가 0개(또는 시트가 비었을 때) 허용할지(false면 경고/에러)</summary>
    public bool optional { get; set; }

    /// <summary>딕셔너리 중복 키가 발생하면 스킵할지(false면 예외)</summary>
    public bool skipDuplicates { get; set; }

    /// <summary> Column 으로 저장하는 방식</summary>
    public bool isColumnBased { get; set; }


    public SheetBindingAttribute(
        string sheetName = null,
        bool optional = true,
        bool skipDuplicates = false,
        bool isColumnBased = false)
    {
        this.SheetName = sheetName;
        this.optional = optional;
        this.skipDuplicates = skipDuplicates;
        this.isColumnBased = isColumnBased;
    }
}
isColumnBased:
만약 시트 이름 앞에 느낌표(!) 또는 * 를 붙이거나, SheetBinding 어트리뷰트에 isColumnBased 옵션을 true로 설정하면,
해당 시트는 열(Column) 단위로 데이터를 처리합니다.

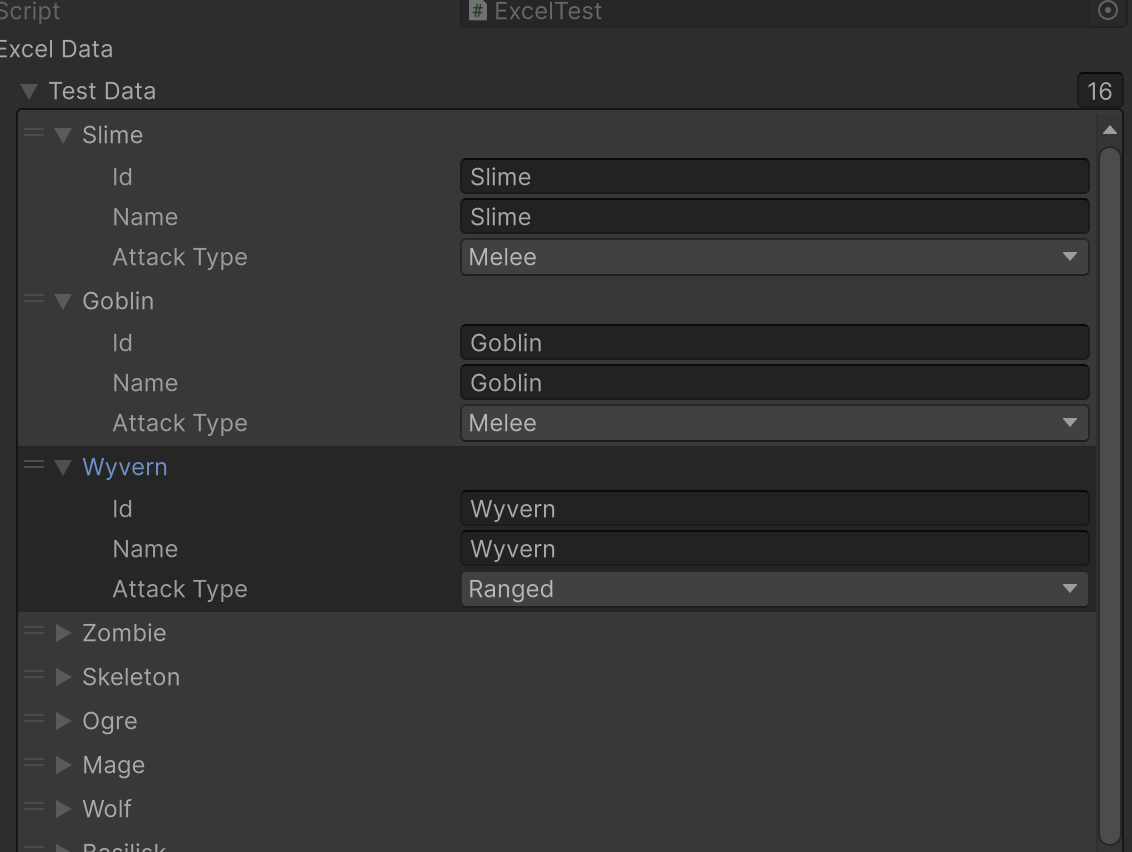
Enum 지원
예를 들어, MonsterData 클래스에 enum 타입 필드를 선언하면,
아래처럼 잘 매핑됩니다.
public class MonsterData
    {
        public string Key() => $"Mosnter_{id}";
        public string id;
        public string name;

        public AttackType attackType;
    }
단일 객체와 리스트, 딕셔너리 매핑
- 리스트가 아닌 단일로 데이터를 매핑할 때는 첫 번째 데이터 행만 사용합니다.
- 딕셔너리로 데이터를 매핑할 때는 첫 번째 칼럼의 값을 key로 사용합니다.
- ( MonsterData로 예시를 본다면 컬럼 id가 들어갑니다 ( Slime , Goblin 등등)
- 기본적으로 딕셔너리는 같은 키가 들어갈 경우 에러를 발생합니다. 휴먼에러 방지
딕셔너리 Key는 첫 번째 칼럼의 값이 들어갑니다.
커스텀 Key 사용
- 만약 커스텀 key 값을 사용하고 싶다면, 클래스 내에 Key() 메소드를 추가하면 됩니다.
public class ExcelData
{
    public Dictionary<string,MonsterData> MonsterData;
}


public class MonsterData
{
    public string Key() => $"Mosnter_{id}";
    public string id;
    public string name;

    public AttackType attackType;
}


[Serializable]
public class Test
{
    public string Key;
    public MonsterData Monster;

}
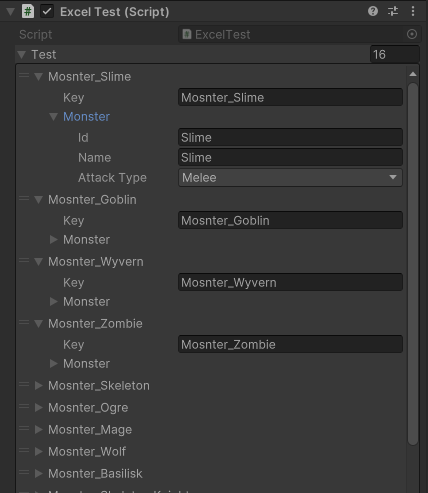
key는 오브젝트로 들어갑니다 int enum 등등
커스텀 파서 (ICustomParser)
기본적으로 지원하지 않는 타입은 커스텀 파서를 통해 처리할 수 있습니다.
예를 들어, Vector2를 파싱하려면 아래와 같이 구현할 수 있습니다.
ICustomParser없을경우는 static타입의 ParseValue 함수를 보도록 했습니다.
    public class MonsterData
    {
        public string id;
        public string name;

        [ExcelParer(customParser:typeof(Vector2Parser))]
        public Vector2 test;
    }


    public interface ICustomParser
    {
        object Parse(string value);
    }

    public readonly struct Vector2Parser : ICustomParser
    {
        public object Parse(string value)
        {
            return ParseValue(value);
        }

        public static Vector2 ParseValue(string value)
        {
            var parts = value.Split(',');
            if (parts.Length == 0)
                throw new Exception($"Invalid Vector2 format: {value}");

            if (parts.Length == 1)
            {
                return new Vector2(float.Parse(parts[0].Trim()), 0);
            }

            return new Vector2(float.Parse(parts[0].Trim()), float.Parse(parts[1].Trim()));
        }
    }
직접 이런식으로 구현 가능합니다
public class MonsterData
    {
        public string id;
        public string name;

        public WeightedValue<int> test2;
    }


    public readonly struct WeightedValue<T> : ICustomParser
    {
        public readonly T value;
        public readonly float weight;

        public WeightedValue(T value, float weight)
        {
            this.value = value;
            this.weight = weight;
        }

        public override string ToString() => $"{value} ({weight})";

        public object Parse(string value)
        {
            return ParseValue(value);
        }

        // 예: "Apple:0.75" → value="Apple", weight=0.75

        public static WeightedValue<T> ParseValue(string value)
        {
            var parts = value.Split(':');
            if (parts.Length < 2)
                throw new Exception("Invalid format for WeightedValue. Expected: value:weight");
            T val = (T)Convert.ChangeType(parts[0].Trim(), typeof(T));
            float w = float.Parse(parts[1].Trim());
            return new WeightedValue<T>(val, w);
        }
    }
멀티 컬럼 파서 (IMultiColumnParser)
여러 컬럼의 데이터를 조합해 하나의 객체를 만들 수도 있습니다.
아래 예시는 SetParser를 통해, "setId"과 " setLevel " 컬럼을 결합하는 예시입니다.
    public class MonsterData
    {
        public string id;
        public string name;

        [MultiColumnParser(typeof(SetParser),"setId","setLevel")]
        public Set set;
    }


    public readonly struct SetParser : IMultiColumnParser
    {
        // values[0] -> setId, values[1] -> setLevel
        public object Parse(params string[] values)
        {
            if (values.Length < 2)
                throw new Exception($"Not enough columns to parse Set object. Got {values.Length} columns.");

            var set = new Set();
            set.Name = values[0];             // string 값 그대로 사용
            set.Value = values[1]; // int 값 파싱
            Debug.Log($"Name: {set.Name} value : {set.Value} ");
            return set;
        }
    }

    public class Set
    {
        public string Name;
        public string Value;
    }
만약 같은 이름의 칼럼이 존재한다면
배열이 아닌 단일의 변수라면 가장 첫 데이터만 들어가고
리스트라면 배열로 들어가게됩니다
level = level # up (같은 level를 보고있음)
int[] level 이라면
둘 다 들어갑니다
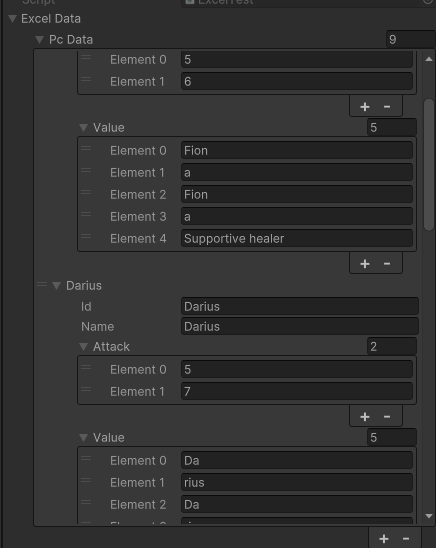
기본 분리 기호
기본적으로 배열이나 리스트는 쉼표(,)를 기준으로 데이터를 분리합니다.
만약 다른 분리 기호를 사용하고 싶다면, ExcelParerAttribute의 Separator를 변경하시면 됩니다
[Serializable]
public class PcData
{
    public string id;
    public string name;
    public float[] attack;
    public List<string> value;
}
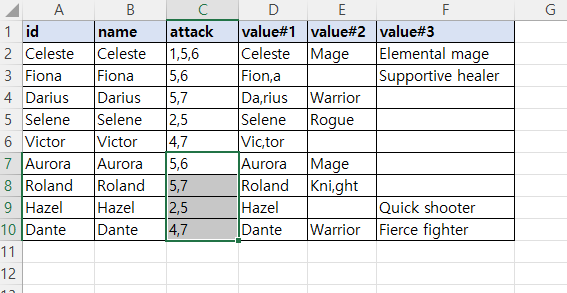

만약 같은 컬럼(변수)를 단순하게 합치는 형식으로 하고 싶다면
MergedCells 를 true로 하시면
[Serializable]
public class PcData
{
    public string id;
    public string name;
    public float[] attack;
    [ExcelParer(mergedCells:true)]
    public List<string> value;
}
이런식으로 같은 변수끼리 Separator를 통해서 글자가 합쳐집니다.
| value#1 | value#2 |
| Cele,ste | Mage |
MergedCells 가 true 라면 value = Cele,ste , Mage 로 변경되고 배열의 값은 ["Cele","ste", "Mage"] 입니다
( Separator 를 통해서 나눠집니다)
MergedCells 가 false 라면 [ "Cele,ste " , " Mage" ] 가 들어갑니다.
모바일 환경에서의 활용
모바일에서는 엑셀 파일을 직접 읽을 수 없으므로,
에디터에서는 엑셀 파일을 읽어 JSON 파일로 변환 및 저장하고,
빌드 후 모바일에서는 해당 JSON 파일을 읽어 데이터를 로드하는 방식을 사용했습니다.
개인적으로는 JSON 데이터를 그대로 저장하지 않고,
암호화와 압축 과정을 거쳐 보안성과 용량 최적화를 동시에 달성했습니다.
using System.IO;
using System.Text;
using System.IO.Compression;
using Newtonsoft.Json;
using UnityEngine;
#if UNITY_EDITOR
using UnityEditor;
#endif

public static class JsonByteHandler
{
    private static string dataPath = Path.Combine(Application.dataPath, "Resources");

    public static byte[] SerializeToBytes<T>(T data)
    {
        string json = JsonConvert.SerializeObject(data, Formatting.None);
        return Encoding.UTF8.GetBytes(json);
    }

    public static T DeserializeFromBytes<T>(byte[] bytes)
    {
        string json = Encoding.UTF8.GetString(bytes);
        return JsonConvert.DeserializeObject<T>(json);
    }

    public static byte[] Compress(byte[] data)
    {
        using (MemoryStream output = new MemoryStream())
        {
            using (GZipStream gzip = new GZipStream(output, CompressionMode.Compress))
            {
                gzip.Write(data, 0, data.Length);
            }
            return output.ToArray();
        }
    }

    public static byte[] Decompress(byte[] data)
    {
        using (MemoryStream input = new MemoryStream(data))
        using (GZipStream gzip = new GZipStream(input, CompressionMode.Decompress))
        using (MemoryStream output = new MemoryStream())
        {
            gzip.CopyTo(output);
            return output.ToArray();
        }
    }

    public static void SaveCompressedData<T>(T data, string fileName = "data.bytes")
    {
        if (!Directory.Exists(dataPath))
        {
            Directory.CreateDirectory(dataPath);
        }
        string filePath = Path.Combine(dataPath, fileName);
        byte[] jsonBytes = SerializeToBytes(data);
        byte[] compressedBytes = Compress(jsonBytes);
        File.WriteAllBytes(filePath, compressedBytes);

#if UNITY_EDITOR
        AssetDatabase.Refresh();
#endif
    }

    public static T LoadCompressedData<T>(string fileName = "data")
    {
        var _data = Resources.Load<TextAsset>(fileName);

        if (_data == null)
        {
            return default;
        }

        byte[] compressedBytes = _data.bytes;
        byte[] decompressedBytes = Decompress(compressedBytes);

        return DeserializeFromBytes<T>(decompressedBytes);
    }
}